> ## Documentation Index
> Fetch the complete documentation index at: https://documentation.claruswms.com/llms.txt
> Use this file to discover all available pages before exploring further.
# Image Capture on HHDs
> How to use the image capture feature on Handheld Devices to take photos and attach them directly to tasks during Goods In or Goods Out workflows.
## Image capture overview
You can take photos on your HHD and attach them directly to tasks in **Goods In** or **Goods Out** workflows. This makes it easy to record visual evidence during warehouse operations.
Image capture must first be configured within your HHD flow before it can be used.
## Using image capture in your workflow
Once the flow is set up, you can use image capture in both Goods In and Goods Out. For example, in the "Receive by Storage Unit" flow:
Scan the storage unit reference for the pallet you are receiving.
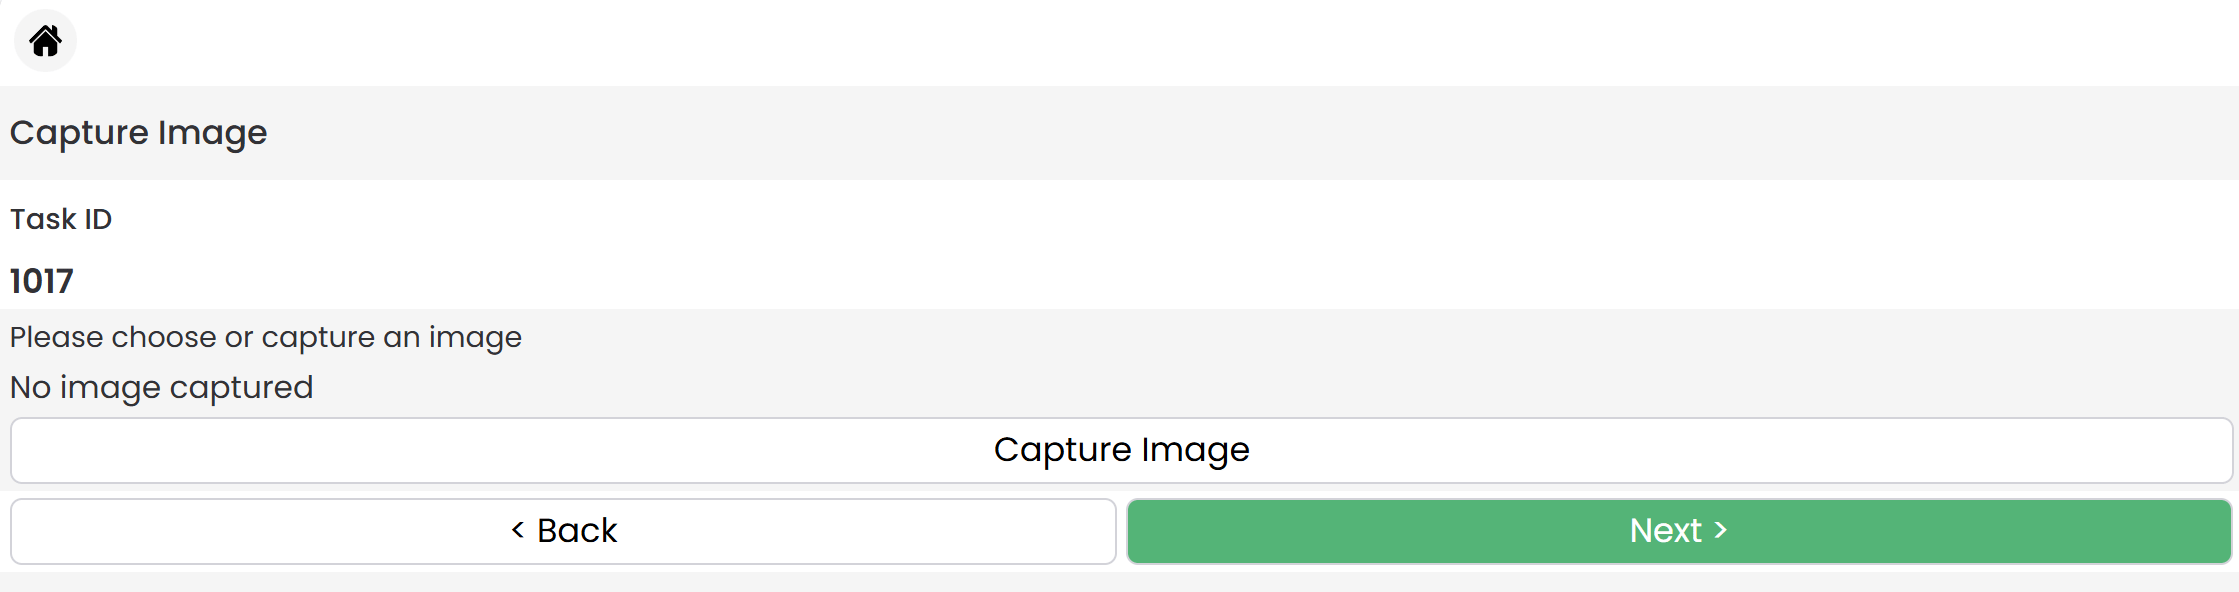
 The system takes you to a screen with a **Capture Image** button. Select it to begin.
 The HHD's camera activates, allowing you to take a photo. You will then see the task ID screen, with options for Back, Next, or Capture Image.
 After taking a photo, you have three options:
* **Delete** the image
* **Retake** the image
* **Confirm** the image
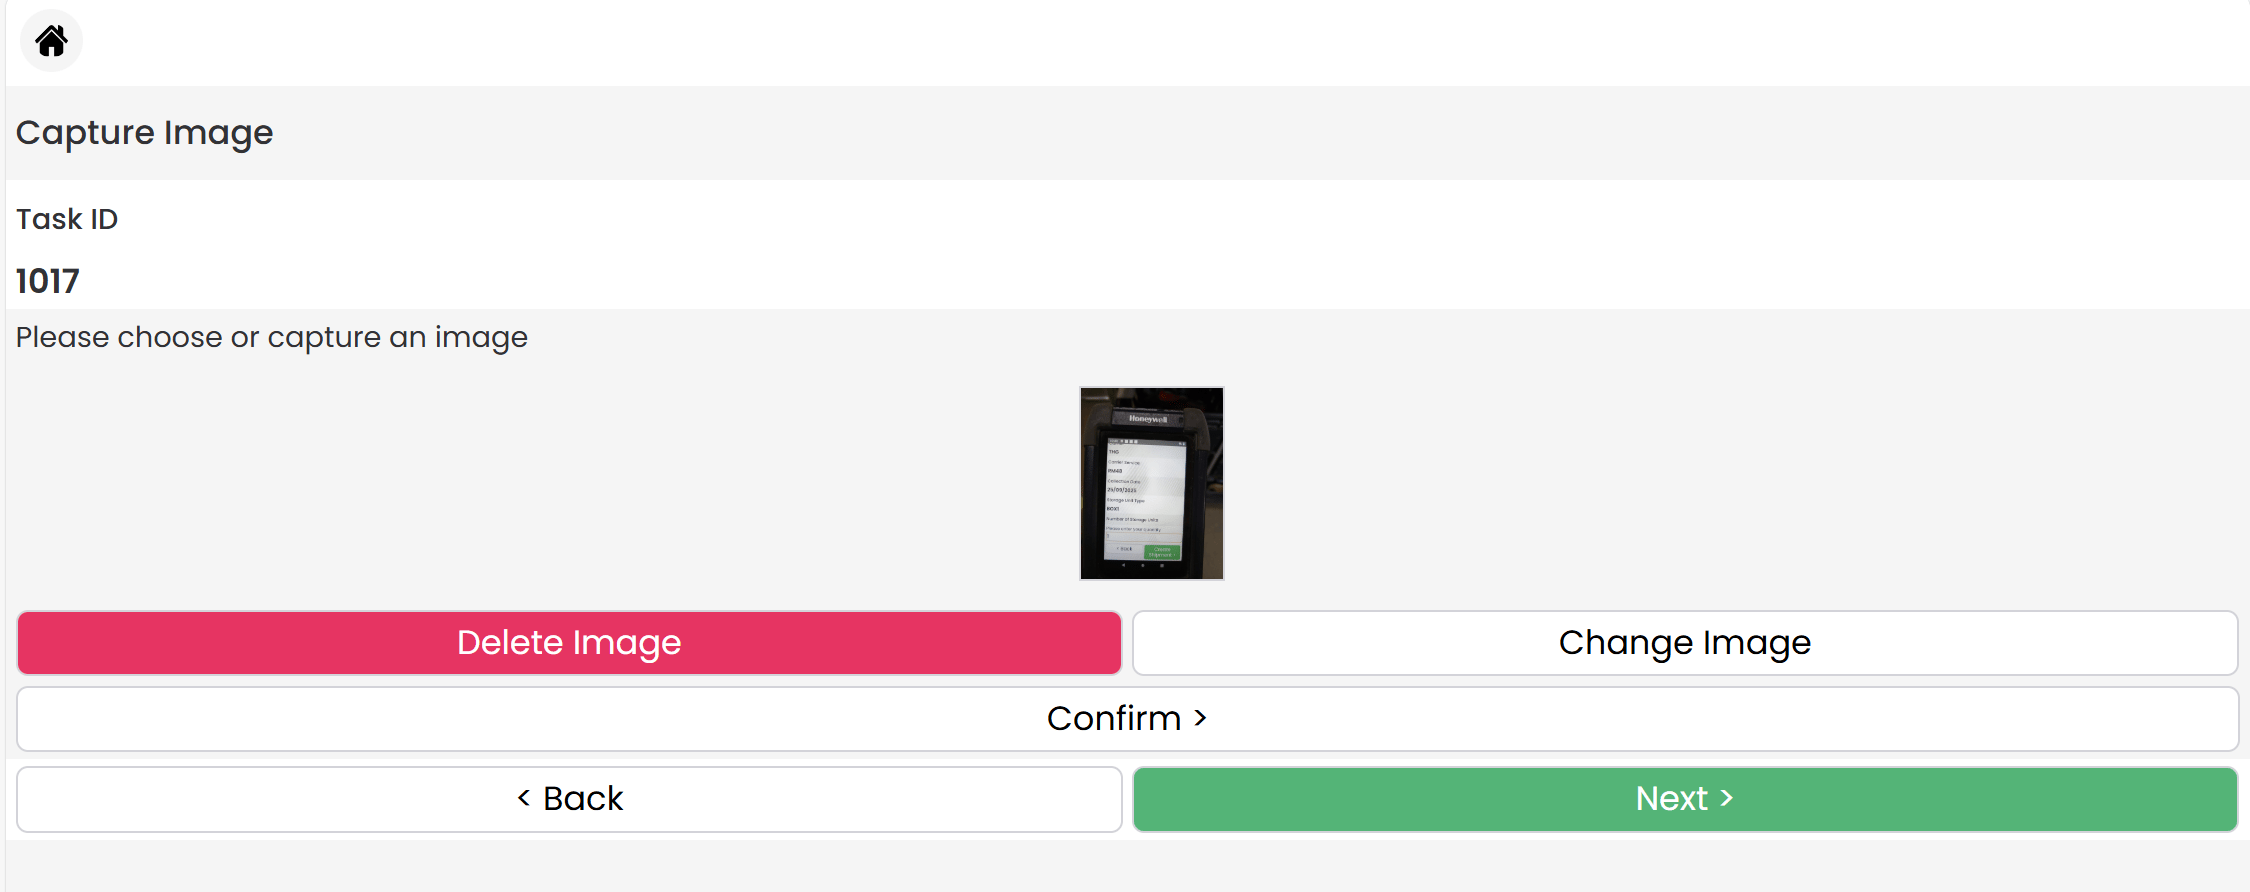
After taking a photo, you have three options:
* **Delete** the image
* **Retake** the image
* **Confirm** the image
 Once confirmed, a message appears confirming the image has been saved.
If you need additional photos for the same task, select **Take Another Photo**. You can attach **up to 10 images per task ID**.
When you are finished, press **Next** to continue to the following task. The process repeats for each new task.
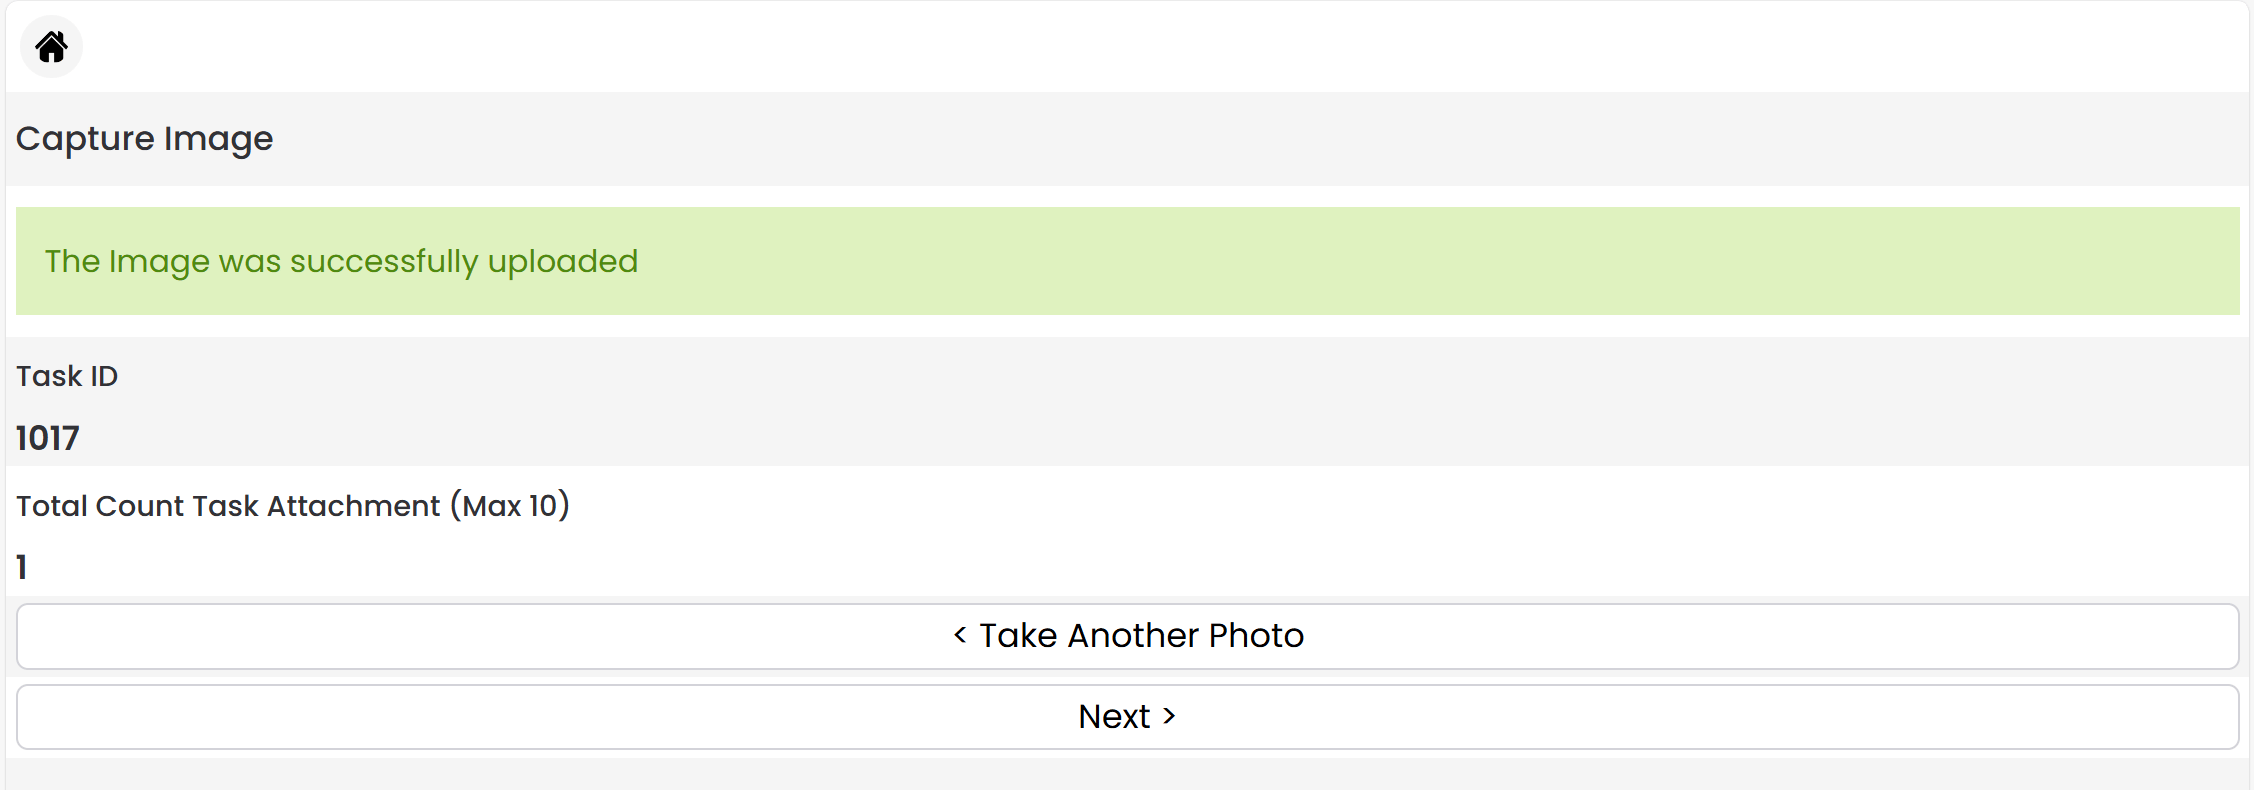
Once confirmed, a message appears confirming the image has been saved.
If you need additional photos for the same task, select **Take Another Photo**. You can attach **up to 10 images per task ID**.
When you are finished, press **Next** to continue to the following task. The process repeats for each new task.
 ## Viewing attached images
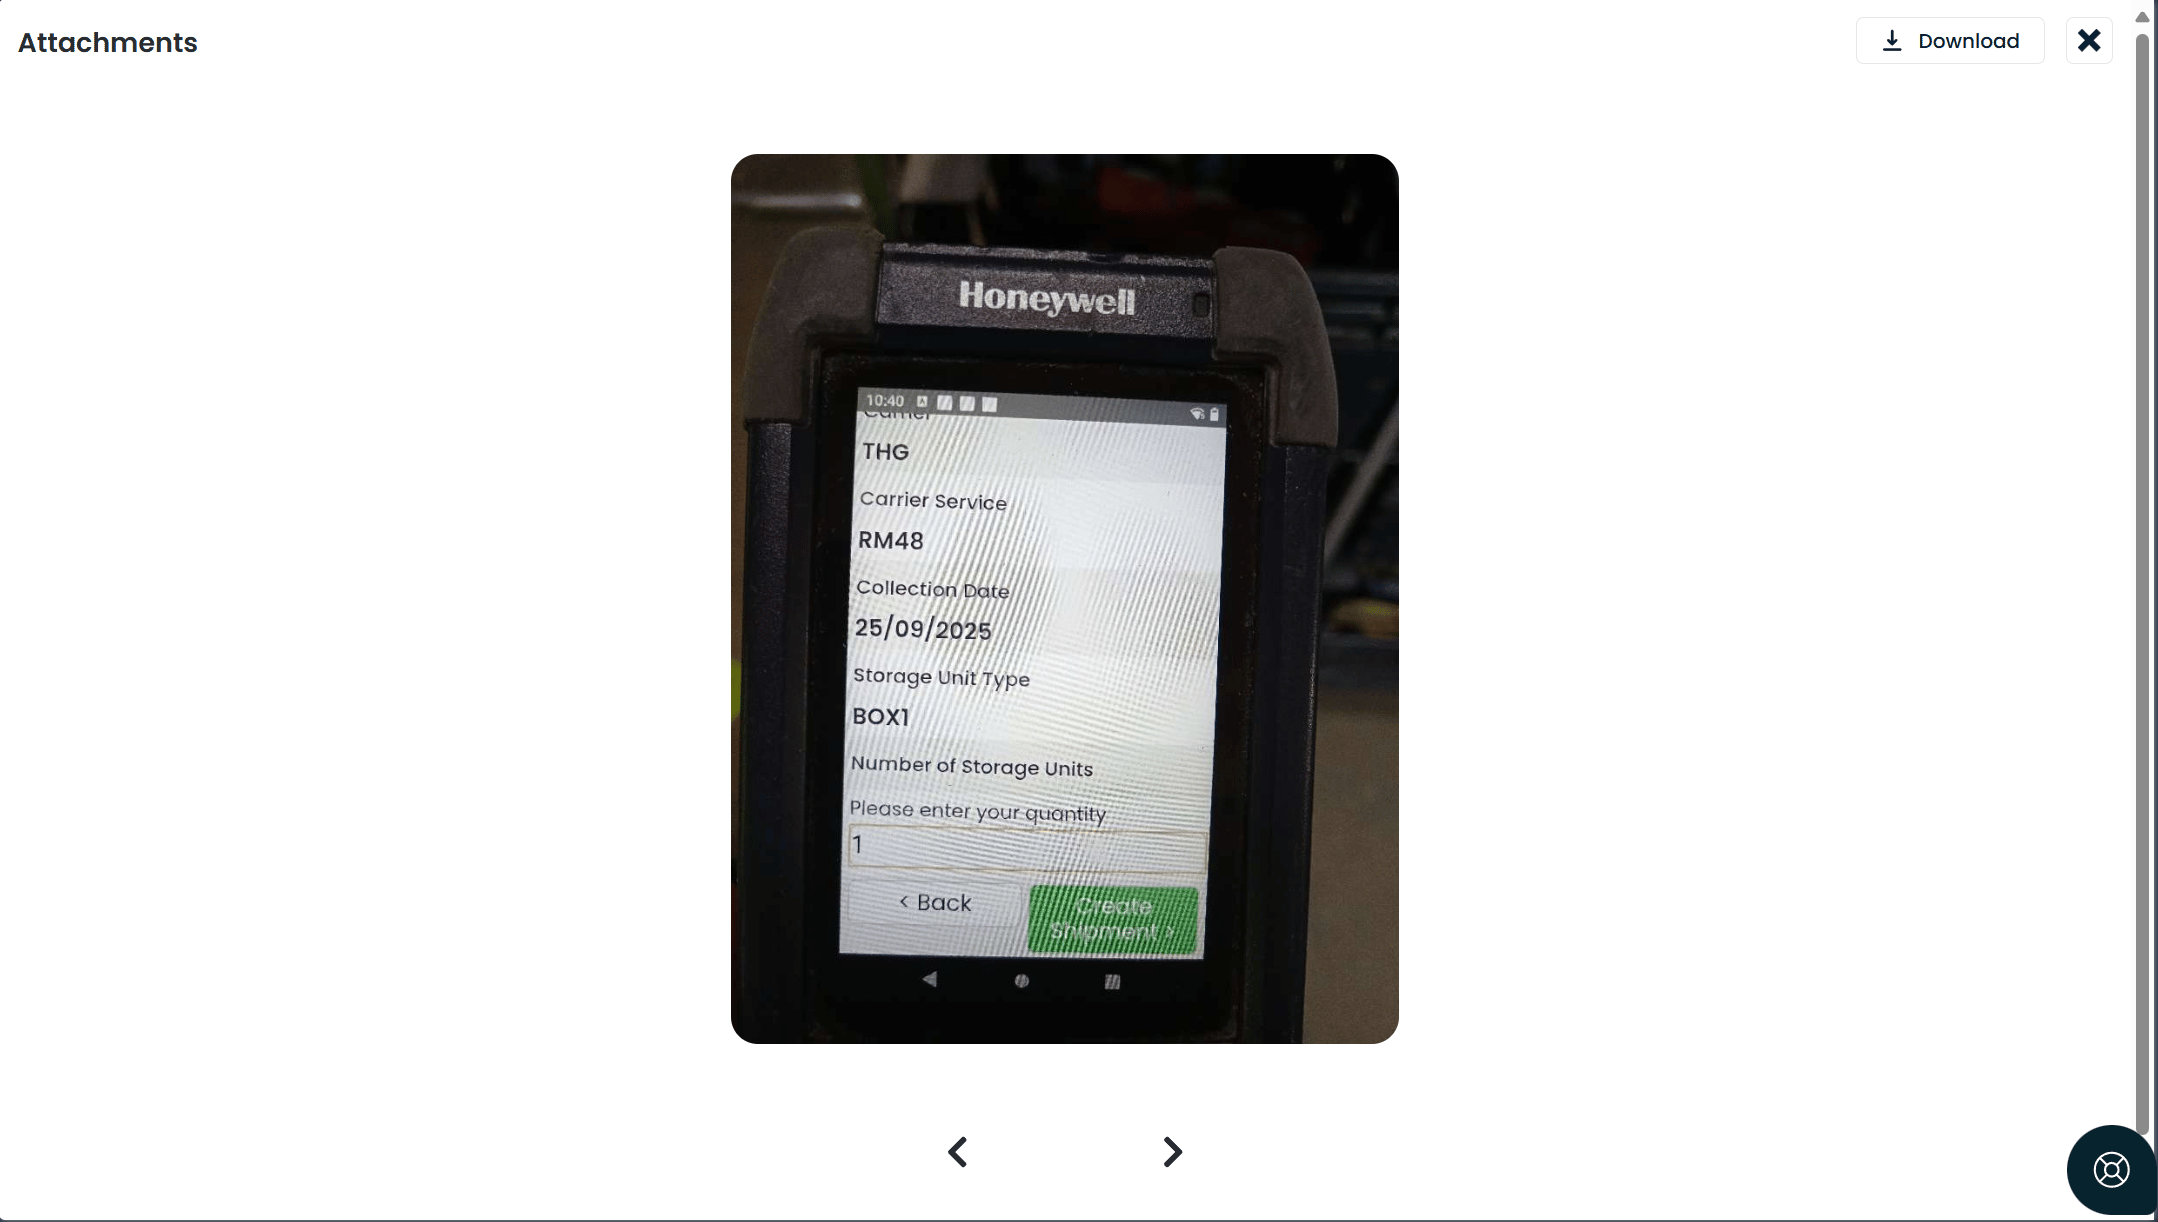
To review images from the **desktop app**:
1. Navigate to **Goods In** > **Receipts**.
2. Locate the receipt you processed on the HHD.
3. On each receipt line, you will see a **paperclip icon**.
4. Click the paperclip to view the images attached to that task.
## Viewing attached images
To review images from the **desktop app**:
1. Navigate to **Goods In** > **Receipts**.
2. Locate the receipt you processed on the HHD.
3. On each receipt line, you will see a **paperclip icon**.
4. Click the paperclip to view the images attached to that task.
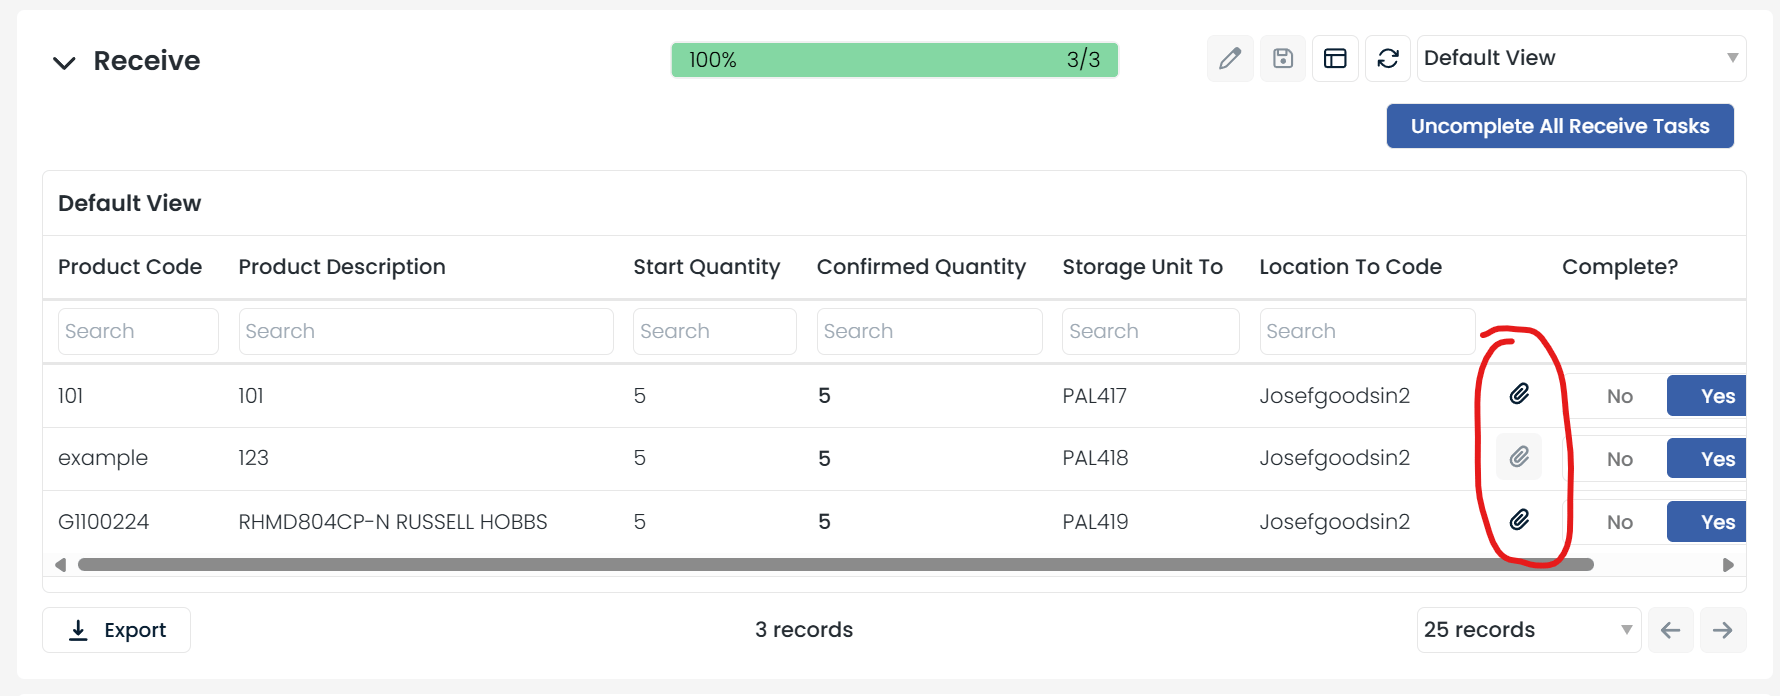 Use the arrows to browse images and the **Download** button to save them to your PC.
 ## Skipping image capture
If no images are required for a task, simply press **Next** after scanning the storage unit. The task completes without attaching any images.
## Skipping image capture
If no images are required for a task, simply press **Next** after scanning the storage unit. The task completes without attaching any images.