> ## Documentation Index
> Fetch the complete documentation index at: https://documentation.claruswms.com/llms.txt
> Use this file to discover all available pages before exploring further.
# Packing Desk User Guide
> Use the packing desk for a visual packing workflow, from locating pack tasks to scanning items and finalising shipments.
## Packing Desk Overview
The packing desk provides a visual representation of the packing process, giving you more clarity and information during order fulfilment.
### 1. Accessing the Packing Desk
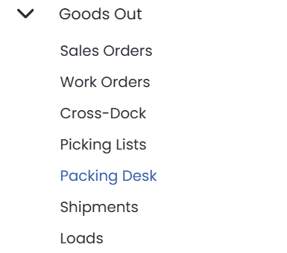
Navigate to the **Goods Out** tab in the main menu and select **Packing Desk**.
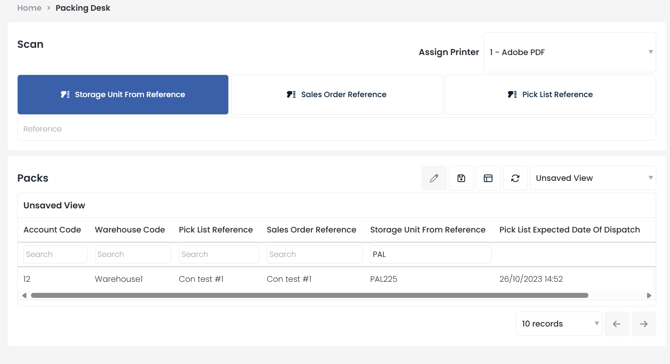 The main Packing Desk screen displays all current pack tasks associated with a pick list and provides these key functionalities:
* **View current pack tasks** -- See all pack tasks awaiting processing.
* **Assign a printer** -- Ensure labels and documents print to the correct device.
* **Search for pack tasks** -- Locate orders using Storage Unit Reference, Sales Order Reference, or Pick List Reference. These can also be scanned using a scanner or HHD.
***
### 2. Preparing to Pack
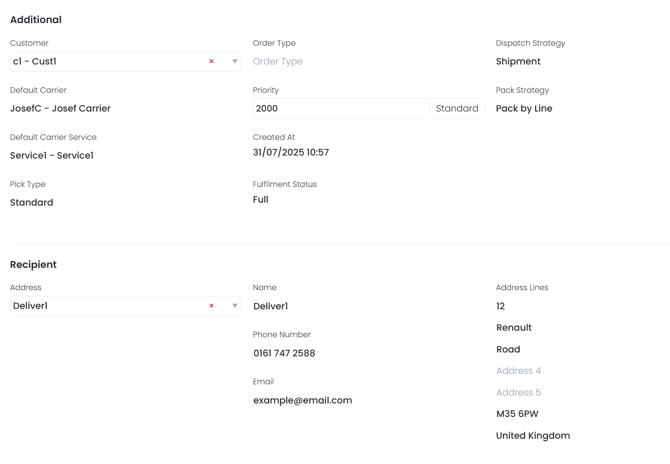
Before packing, ensure the following requirements are met:
* **Dispatch Strategy**: Must be set to **Shipment**.
* **Pack Strategy**: Must be set (either Pack by Line or Pack by Unit).
* **Complete Delivery Address**: Must include address lines, postcode, phone number, and email.
* **Pick List Status**: All pick tasks must be completed to generate pack tasks.
The main Packing Desk screen displays all current pack tasks associated with a pick list and provides these key functionalities:
* **View current pack tasks** -- See all pack tasks awaiting processing.
* **Assign a printer** -- Ensure labels and documents print to the correct device.
* **Search for pack tasks** -- Locate orders using Storage Unit Reference, Sales Order Reference, or Pick List Reference. These can also be scanned using a scanner or HHD.
***
### 2. Preparing to Pack
Before packing, ensure the following requirements are met:
* **Dispatch Strategy**: Must be set to **Shipment**.
* **Pack Strategy**: Must be set (either Pack by Line or Pack by Unit).
* **Complete Delivery Address**: Must include address lines, postcode, phone number, and email.
* **Pick List Status**: All pick tasks must be completed to generate pack tasks.
 ***
### 3. Starting a Pack
Use the search fields to find the order you want to pack.
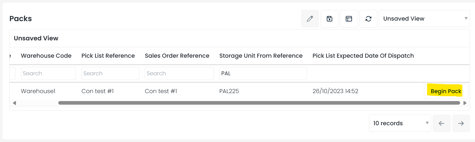
Either scroll right and click **Begin Pack**, or **scan the reference** to start packing.
***
### 3. Starting a Pack
Use the search fields to find the order you want to pack.
Either scroll right and click **Begin Pack**, or **scan the reference** to start packing.
 A menu will appear with available **Storage Unit Types**. These can be managed via **Settings** > **Storage Unit Types**.
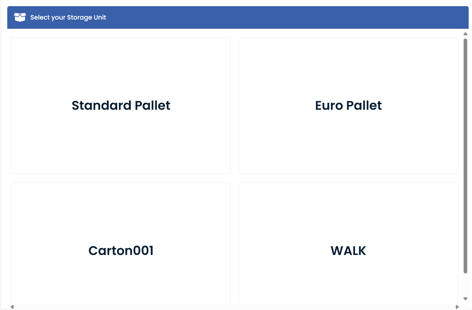 Select the storage unit type you wish to pack into.
***
### 4. Packing Items
Once you select a storage unit type, you will see the **Packing Screen**:
Select the storage unit type you wish to pack into.
***
### 4. Packing Items
Once you select a storage unit type, you will see the **Packing Screen**:
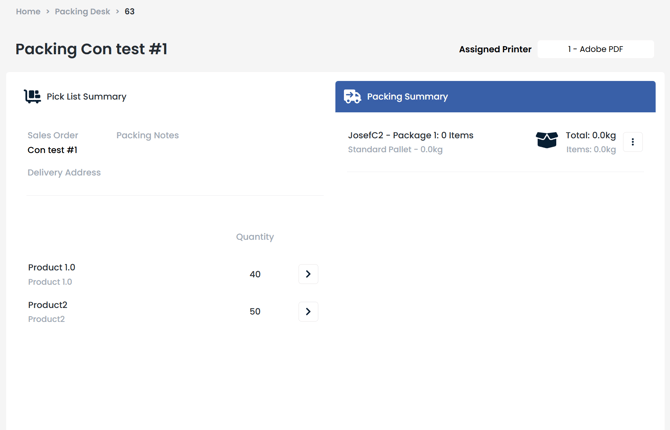 * **Left Panel**: Displays the sales order reference, delivery address, packing notes, and products with quantities.
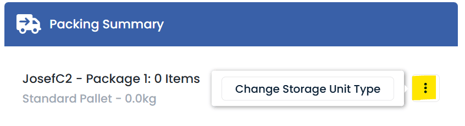
* **Right Panel (Packing Summary)**: Shows the package contents, dimensions, and total weight. You can also change the storage unit type here.
* **Left Panel**: Displays the sales order reference, delivery address, packing notes, and products with quantities.
* **Right Panel (Packing Summary)**: Shows the package contents, dimensions, and total weight. You can also change the storage unit type here.
 #### Moving Items into the Package
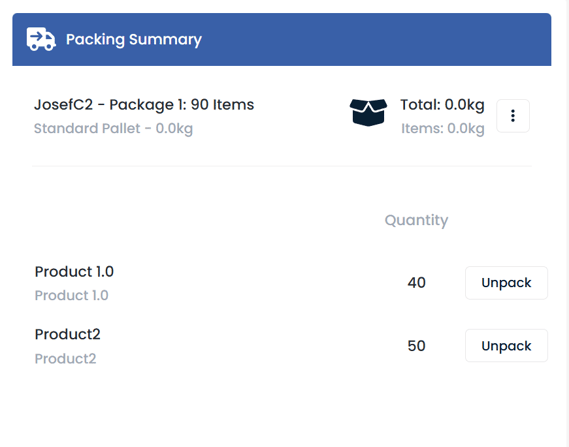
Scan items to move them into the packing summary, or use the arrows next to items to manually move them across. Repeat until all items are packed.
#### Moving Items into the Package
Scan items to move them into the packing summary, or use the arrows next to items to manually move them across. Repeat until all items are packed.
 ***
### 5. Finalising the Package
Once all items are packed:
1. Click **Close Package and Print Labels**. This completes the packing process, submits the shipment, and prints labels automatically.
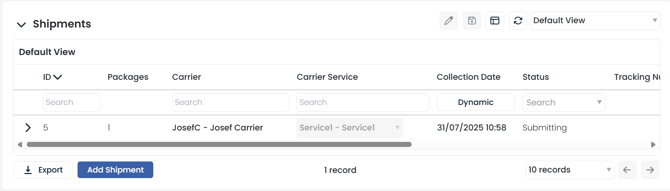
2. Confirm the package is reflected as shipped in the **Sales Order / Pick List** screen.
***
### 5. Finalising the Package
Once all items are packed:
1. Click **Close Package and Print Labels**. This completes the packing process, submits the shipment, and prints labels automatically.
2. Confirm the package is reflected as shipped in the **Sales Order / Pick List** screen.

 ### Key Takeaways
* Ensure all order details and pick tasks are complete **before starting** packing.
* Use the **Packing Summary** to verify weights, dimensions, and contents.
* **Close Package and Print Labels** finalises the shipment and triggers label printing.
### Key Takeaways
* Ensure all order details and pick tasks are complete **before starting** packing.
* Use the **Packing Summary** to verify weights, dimensions, and contents.
* **Close Package and Print Labels** finalises the shipment and triggers label printing.