Gradual rollout: Multi-factor authentication is being rolled out gradually, organisation by organisation. You may not see it on your account yet — that’s expected. Once it’s available, you’ll be prompted on your next sign-in.
Before you start
You’ll need:- Your phone or tablet, unlocked and within reach
- An authenticator app installed on that device
- 1Password — if your team already uses it as a password manager, it works as an authenticator too
- Authy — free, supports backups across devices
- Google Authenticator — free, simple
- Microsoft Authenticator — free, supports backups via your Microsoft account
How to start setup
Most people reach setup via the sign-in prompt — once MFA is available on your account, you’ll see it the next time you log in. Click Set up MFA to be taken to the Set Up Authenticator screen. If you previously chose Remind me later or I don’t want MFA, you can also start setup from Enable MFA in Security Settings. Both routes lead to the same screen.Set up MFA
Open the Set Up Authenticator screen
Click Set up MFA on the sign-in prompt. The Set Up Authenticator screen appears with a QR code and a manual setup code.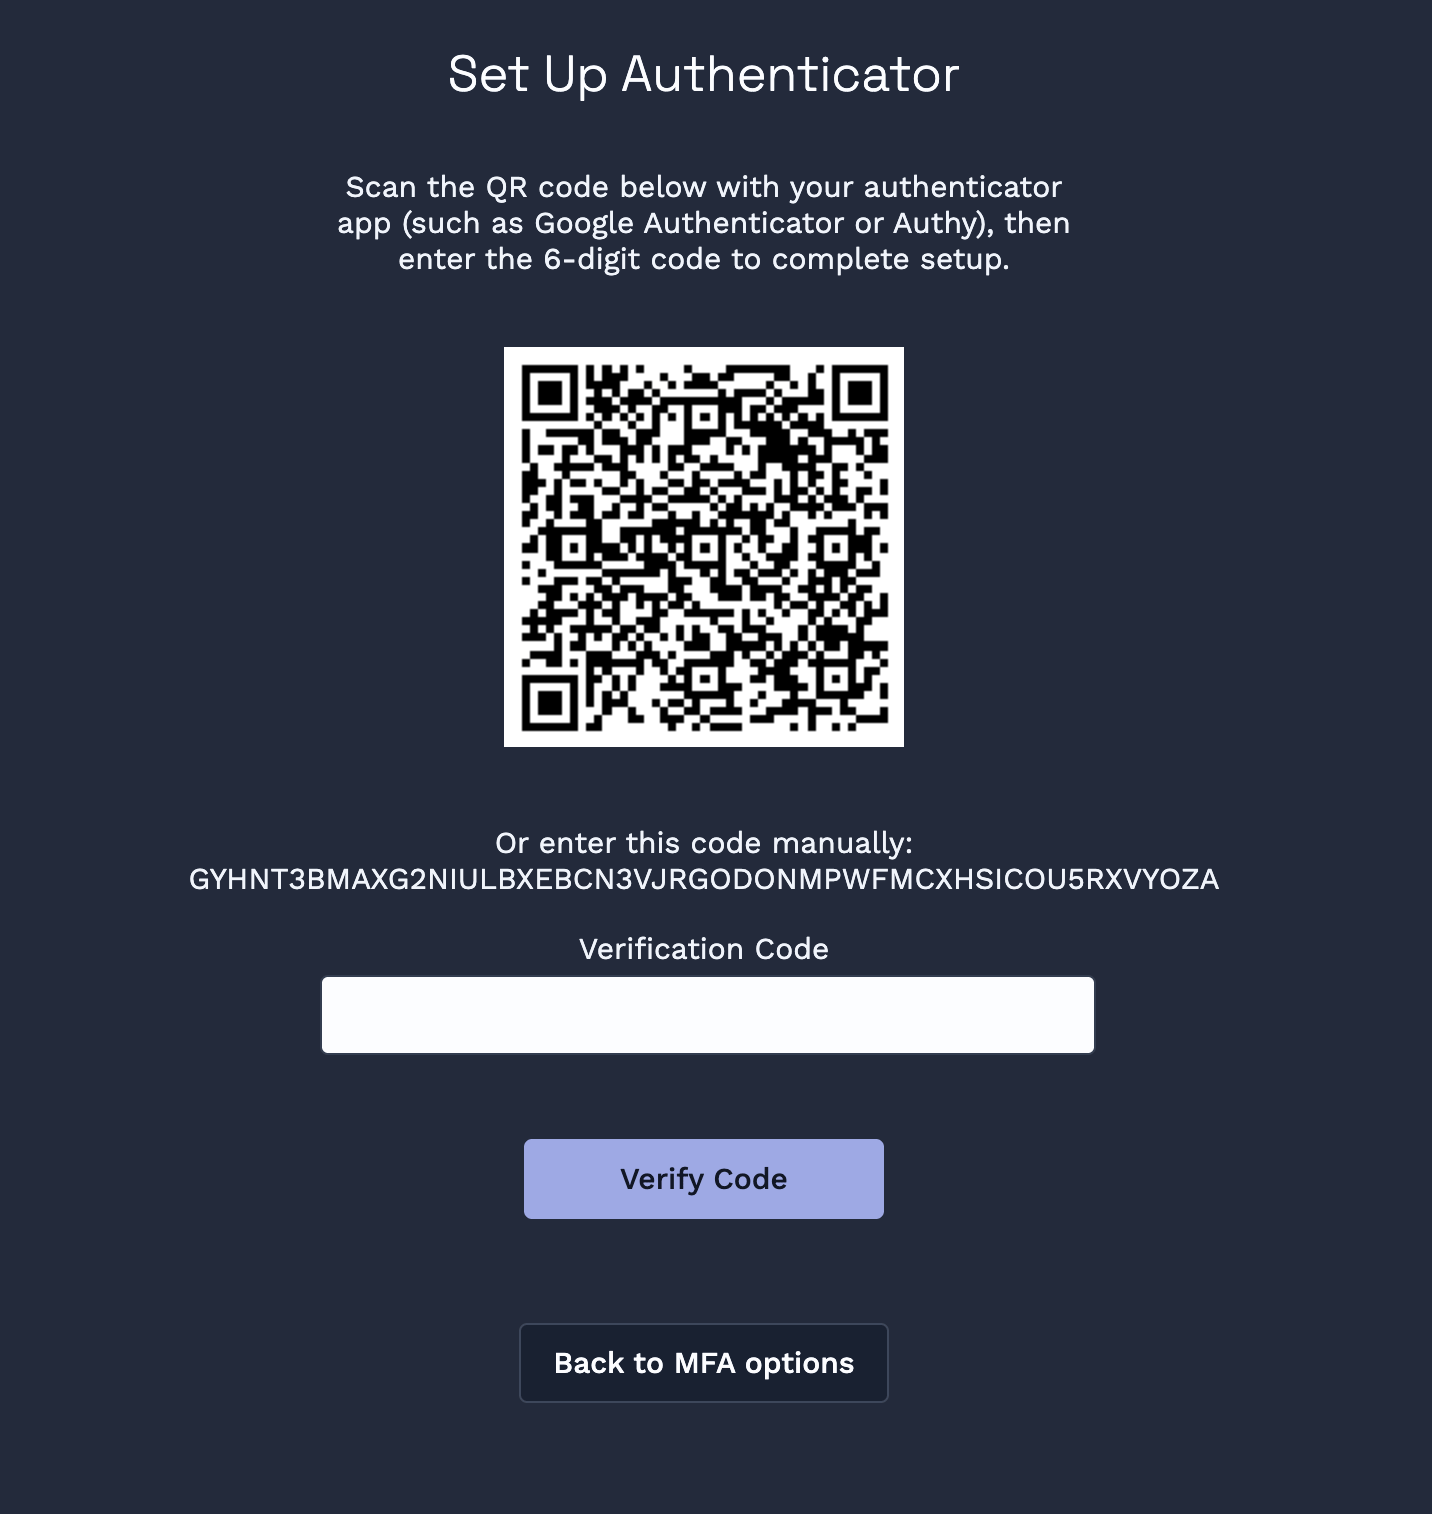
Open your authenticator app
On your phone, open your authenticator app and choose to add a new account (the exact wording depends on the app — look for a + button or Add Account).
Scan the QR code
Use the app’s scanner to point your phone’s camera at the QR code on screen. The app will add a new entry for Clarus WMS and start generating six-digit codes that refresh every 30 seconds.
Enter the verification code
Back in Clarus WMS, type the six-digit code currently shown in your authenticator app into the Verification Code field, then click Verify Code.
Next time you sign in
After your password, you’ll see the Two-Factor Authentication screen. Open your authenticator app, find the Clarus WMS entry, and type the current six-digit code into the Verification Code field, then click Verify Code. The code is valid for about 30 seconds before it refreshes.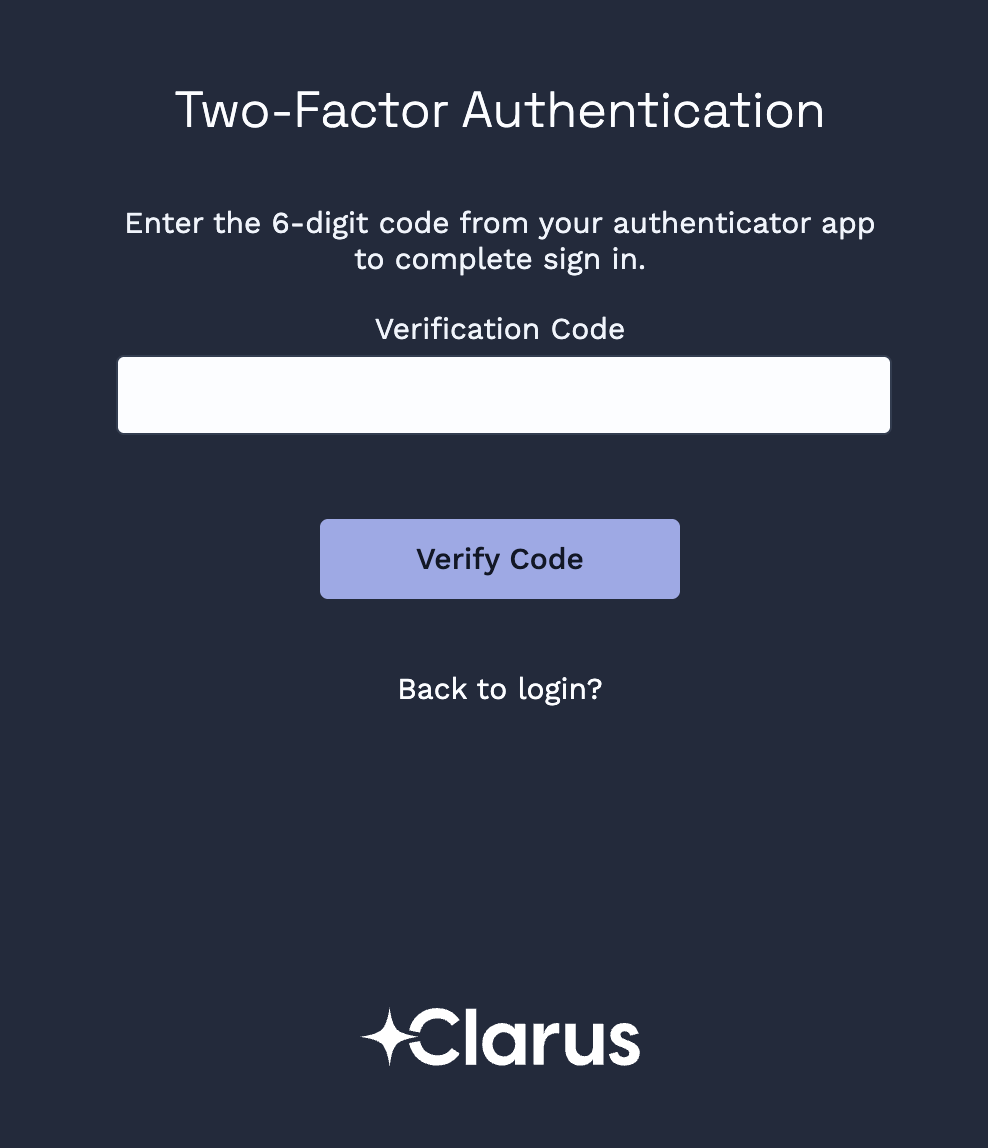
Do I need to do this on every device I sign in from?
Do I need to do this on every device I sign in from?
No. MFA is tied to your account, not your device. You’ll be asked for a code from your authenticator app whenever you sign in, regardless of which browser or device you’re using.
Can I use more than one authenticator app or device?
Can I use more than one authenticator app or device?
No. Clarus WMS supports a single authenticator entry per user. If you want to switch to a different app or a new phone, disable MFA from your Security Settings and set it up again on the new device — see Disable MFA in Security Settings and then Enable MFA in Security Settings.
What if I lose my phone?
What if I lose my phone?
See MFA Issues for recovery options.